Wool Couture Company Limited

Image of a smiling person in quarter profile resting their hand against their head. They're wearing a denim jacket and a bright orange crochet headband with a twist detail at the front.

How to crochet: A beginner's guide

Claire Gelder

1 Sep, 2026 / 9 mins read time

Crochet is a really rewarding craft that allows you to transform a simple ball of yarn into something beautiful and useful. With just a crochet hook, some yarn and a little patience, you can create everything from clothing and accessories to blankets, bags and gifts.

If you have never crocheted before, those first few stitches can feel unfamiliar – but don’t worry. Every crocheter starts in exactly the same place. The secret is to take your time, practise each step and allow your hands to become comfortable with holding the hook and controlling the yarn.

Your first stitches don’t need to be perfect. As you continue, your movements will become more natural and your stitches more even.

One of the loveliest things about crochet is that you only need to learn a few basic techniques to get started. In this guide, we’ll show you how to make a slip knot, hold your hook and yarn, create a foundation chain and work a double crochet stitch. You’ll also learn how to turn your work at the end of a row, fasten off securely and weave in your yarn ends for a neat finish.

Before you begin, find somewhere comfortable to sit with good light. Try to keep your shoulders and hands relaxed, and don’t hold the hook or yarn too tightly.

Crochet has its own gentle rhythm, so work at a pace that feels comfortable to you. If a stitch doesn’t look right, simply undo it and try again – it's all part of learning.

What is crochet?

First up, crochet is a craft technique where yarn or thread is looped together using a single hooked needle, called a crochet hook, to create fabric. It is commonly used to make items such as blankets, clothing, accessories, and decorative pieces, and can range from simple stitches to intricate patterns.

What you need to get started with crochet

It's really easy to get started with crochet, you just need:

  • Yarn (the pattern you're using will specify the type of yarn you need)
  • Crochet hook
  • Yarn needle
  • Scissors

Particularly when you're still learning, make sure you use the type of yarn and size of crochet hook specified in the pattern. There are different size crochet hooks: generally, the bigger the crochet hook, the chunkier the yarn you will need to use.

  • 2.00 mm – 3.25 mm: Lace, 2-ply, or 4-ply yarn
  • 3.50 mm – 4.50 mm: Sport or 5-ply to light Double Knitting (DK) yarn
  • 4.00 mm – 5.50 mm: Standard Double Knitting (DK) and Aran yarn
  • 6.00 mm – 9.00 mm: Chunky and super chunky yarn
  • 9.00 mm and above: Jumbo and mega-chunky yarn

How to crochet: the basic stitches

Slip knot

To create your first crochet stitch, you’ll need to start with a slip knot.

Wool Couture Company Limited
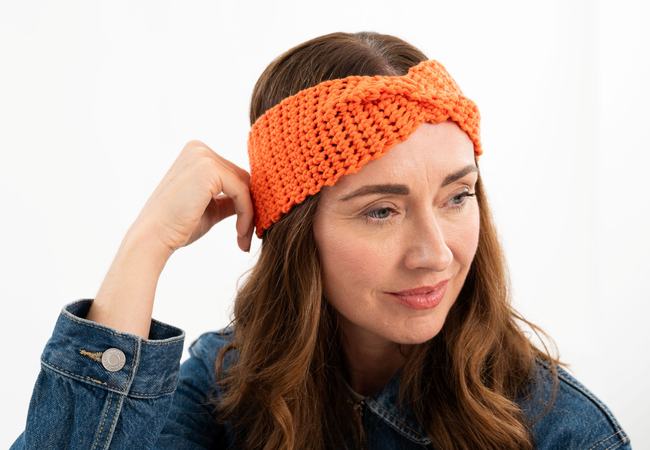
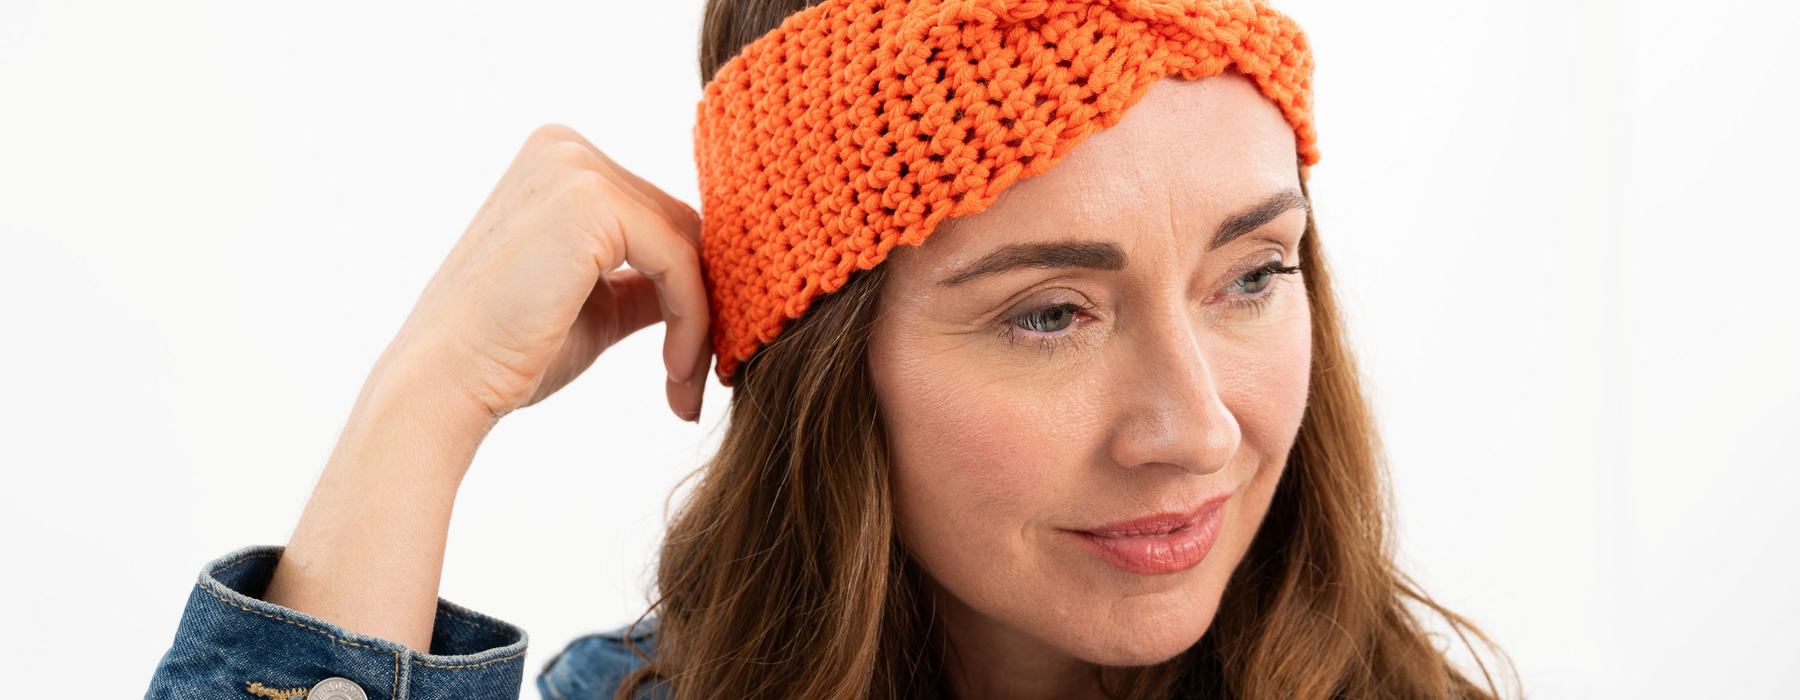
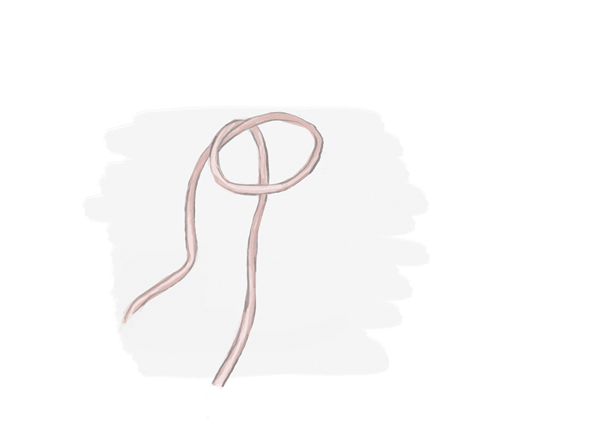
Illustration of a slip knot being formed from pink yarn

Step 1: Make a loop, placing the working yarn behind the loop.

Wool Couture Company Limited
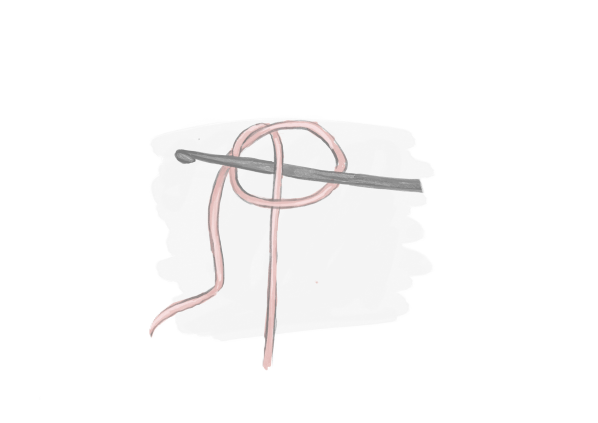
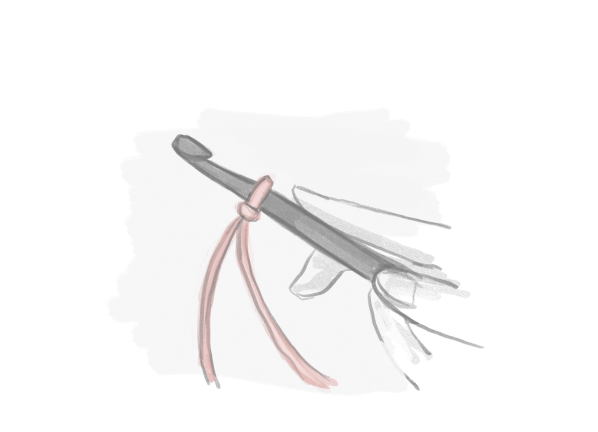
Illustration of a slip knot being tied around a crochet hook

Step 2: Insert the hook beneath the working yarn and over the left hand side of the loop.

Wool Couture Company Limited
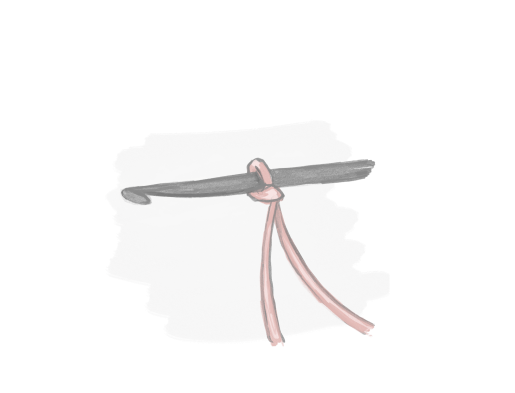
Illustration showing a close up of the fourth stage of trying a slip knot using pink yarn around a crochet hook

Step 3: Hold the yarn tail and the working yarn together and gently pull the knot up to the hook. The knot should sit snug around the hook, but not too tight.

How to hold a hook and yarn

Finding a comfortable way to hold the yarn and hook is essential for crochet, though it might feel strange at first. The goal is to have the yarn winding smoothly off the ball and over the top of your finger, with the right amount of tension. You will hold your hook in your dominant hand.

Wool Couture Company Limited

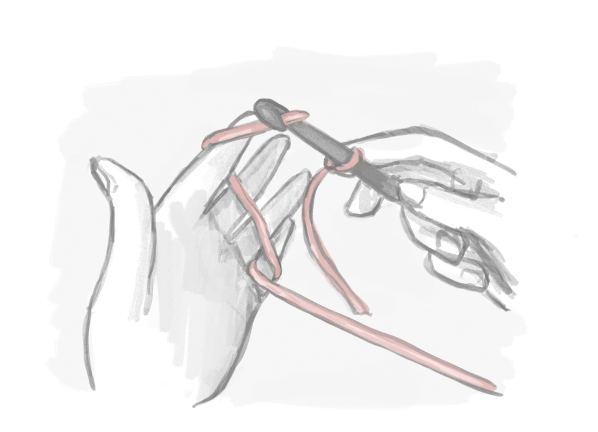
Illustration of two hands holding a crochet hook and pink yarn and showing how to hold the hook

Step 1: Hold your hook as if you are holding a knife.

Wool Couture Company Limited

Illustration of two hands holding a crochet hook and pink yarn and showing how to hold the hook

Step 2: In your other hand, wrap the yarn that is attached to the ball around your little finger and over your index finger from the back to the front. The yarn is now kept taut by your hand and you are ready to start.

Chain stitch

Chain stitches are the foundation of many crochet projects and this is why some designers call the first row of chain stitches the foundation chain. When making your chain, keep your stitches nice and loose so you create an elastic edge.

Wool Couture Company Limited

Illustration of two hands creating a chain stitch

Step 1: Wrap the yarn around the hook in a clockwise direction (this is known as ‘yarn over’).

Wool Couture Company Limited
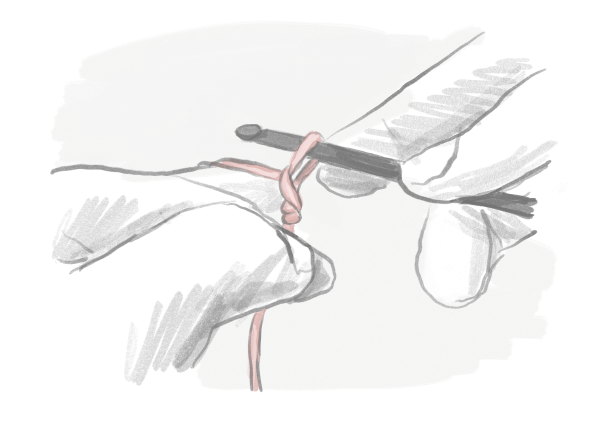
Illustration of two hands using a crochet hook to create a chain stitch

Step 2: Pull the wrapped yarn through the loop on your hook.

Wool Couture Company Limited
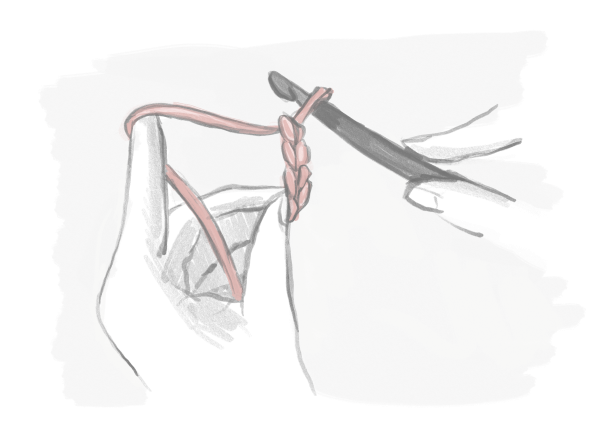
Illustration of two hands creating a chain stitch

Step 3: One chain stitch made! Repeat to make the required number of chain stitches specified in the pattern.

Double (US - single) crochet stitch

This stitch is widely used across many crochet patterns. The terminology for stitches can be different depending on which country you are in, or in which country the pattern has been designed – in the US, this stitch is called single crochet.

Wool Couture Company Limited

Illustration of two hands creating a chain stitch

Step 1: Create the number of chains required according to your pattern.

Wool Couture Company Limited
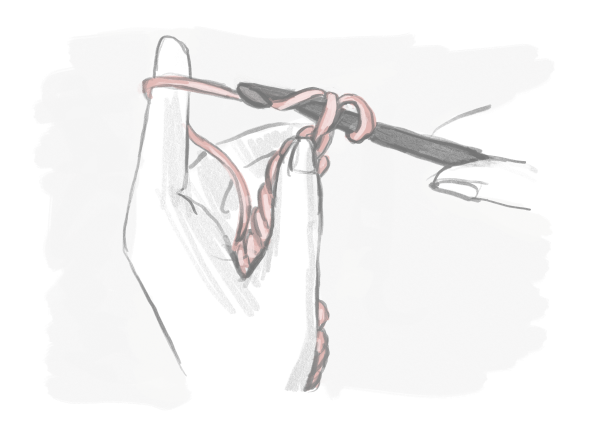
Illustration of two hands creating a double crochet stitch

Step 2: Insert your hook from front to back in the next stitch, or the one identified in your pattern. Yarn over and pull through the stitch (now you have two loops on your hook).

Wool Couture Company Limited
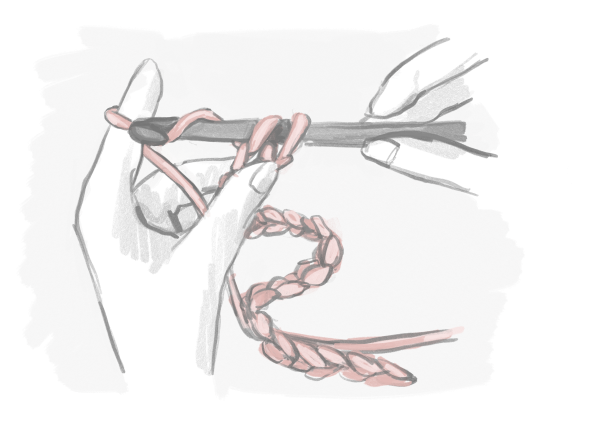
Illustration of two hands holding yarn and a crochet hook and creating double crochet stitch

Step 3: Yarn over and pull the wrapped yarn through the two loops on your hook. You have now completed a double (US single) crochet stitch.

Wool Couture Company Limited
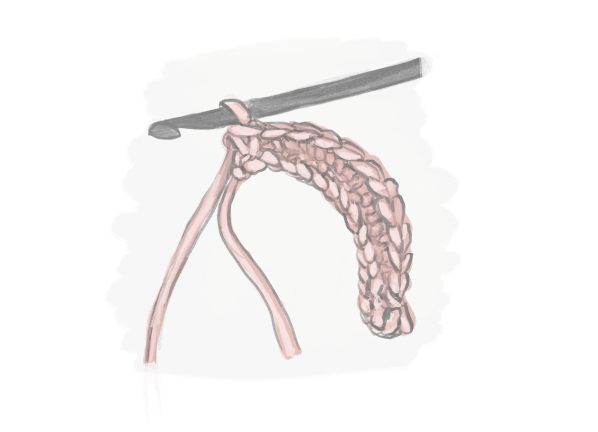
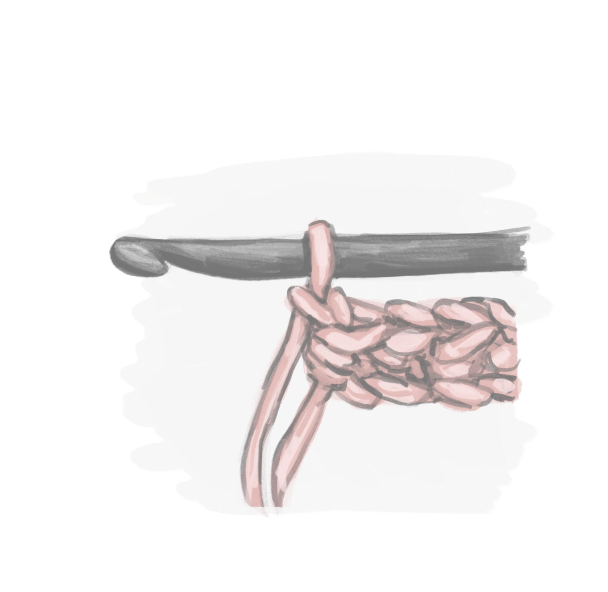
Illustration of a crochet hook and pink yarn showing a set of double crochet stitches

Here’s a row of finished double crochet stitches.

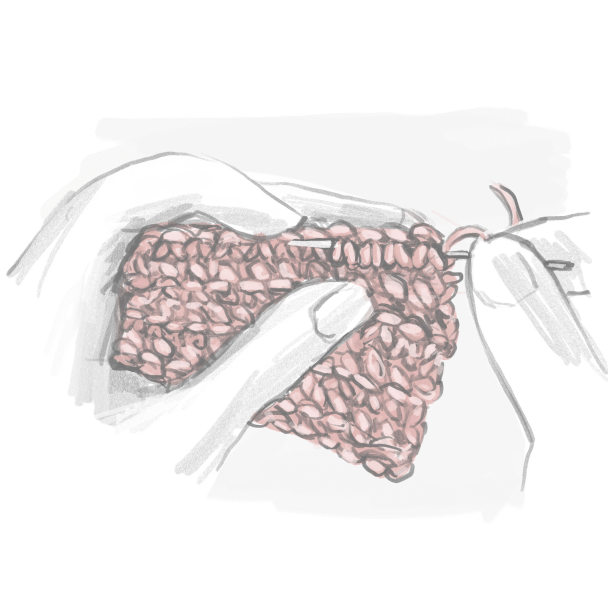
Starting another row turning your work

Here’s how to turn at the end of a row when working double (US single) crochet.

Wool Couture Company Limited

Illustration showing a close up of a crochet hook with yarn and completed crochet stitches and showing how to turn at the end of a row of stitches

Step 1: At the end of the row, chain one stitch. This is so we can create the right height for the double (US single) crochet stitch on the next row.

Wool Couture Company Limited
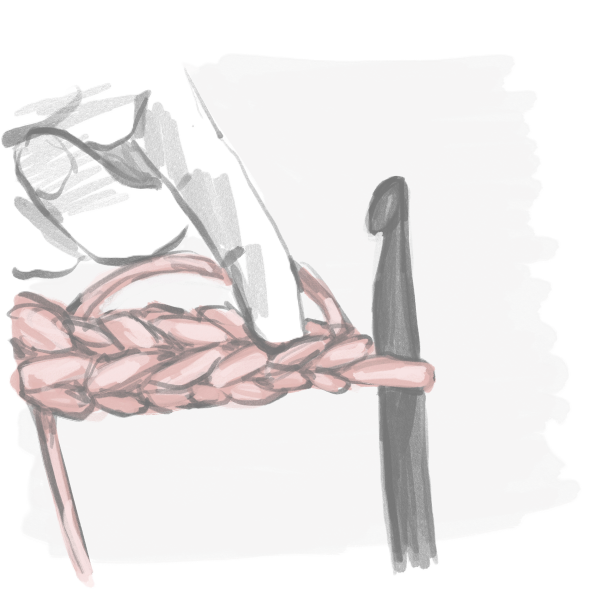
Illustration showing a close up of a crochet hook with yarn and completed crochet stitches and showing the second step of how to turn at the end of a row of stitches

Step 2: Insert the hook in the second stitch away from the hook and make a double (US single) crochet stitch.

Fastening off

When you have crocheted the number of rows required by your pattern, you need to secure your yarn so that all of your hard work doesn’t unravel. Here’s how to fasten off at the end of a row.

Wool Couture Company Limited

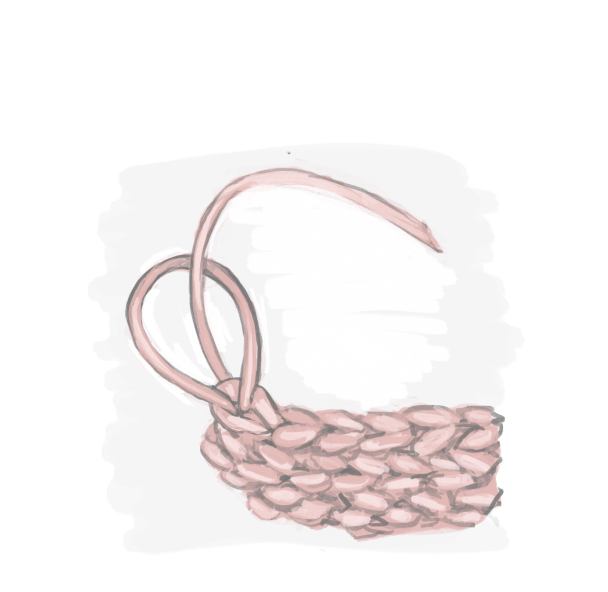
Illustration of pink yarn showing how to fasten off a piece of crochet

To fasten off, at the end of a row cut the working yarn to leave a 30cm (12in) tail, then take the cut yarn end and pull it through the loop of the last stitch in the row to secure.

Weaving in the ends

You will find that at the end of each project, you will have ends to weave in. While the temptation is to complete this part super-quickly, it really does pay to spend time making sure the ends have been woven in neatly. It finishes off your project so nicely.

Wool Couture Company Limited

Illustration showing a close up of a crochet needle threaded with pink yarn and weaving in the remaining thread at the end of a piece of crochet

Step 1: Thread the yarn end into your needle and weave it back and forth through several stitches on the wrong side of the work to secure.

Wool Couture Company Limited
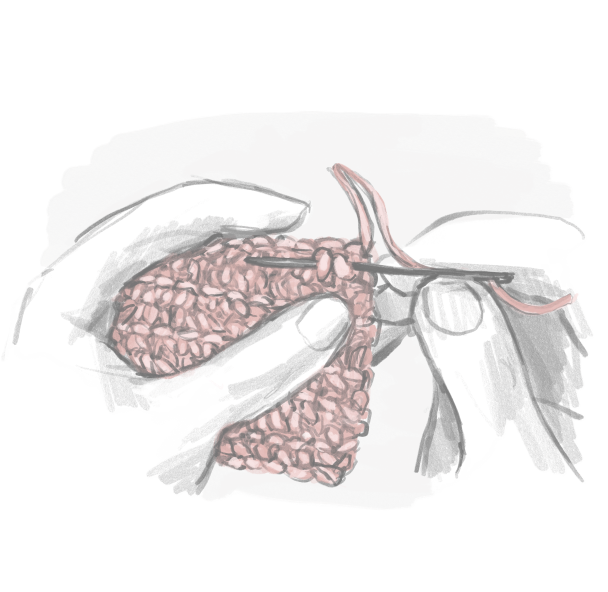
Illustration showing a close up of a crochet needle threaded with pink yarn, weaving in the remaining thread at the end of a piece of crochet

Step 2: Where there are two ends in a row from joining in another ball of yarn, single knot the two ends together and then thread both into the yarn needle. Weave in both at the same time, as step 1, to secure.

Once you've completed your final row, fastened off and carefully woven in the ends, take a moment to appreciate what you have made. You started with a ball of yarn and a crochet hook and turned them into something you can wear – and that is something to feel proud of!

Don’t worry if your first stitches aren’t completely even. Crochet becomes easier and more natural with practice. The important thing is that you've learned the essential techniques and completed your first project.

Now that you understand the basics, you can use these same skills to explore many more crochet patterns and continue your creative journey.

Crochet ideas to try first

A green crochet headband is resting inside a wicket basket on top of different coloured balls of yarn.

Create your own headband

This is a great project for someone new to crochet. As part of Second Hand September, you can sign up for a FREE craft kit which has everything you need: beginner-friendly instructions, quality merino wool and a wooden crochet hook.

Wool Couture and Oxfam have teamed up to provide these free crochet kits, helping to challenge a throwaway culture and raise awareness of the labour that goes into the clothes we wear.

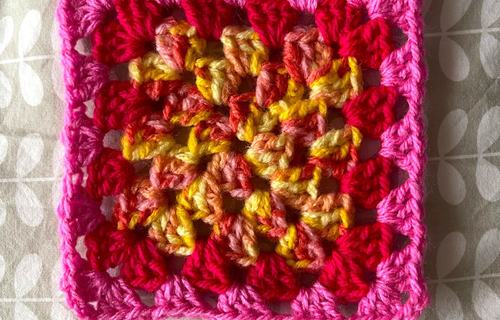
Crochet a granny square

A granny square is one of the most recognisable crochet designs. It's a small square piece of crochet fabric, traditionally worked from the centre outward in rounds, using groups of stitches (usually clusters of three double crochet stitches) separated by chain spaces.

Granny squares are a great place to start because you can practise your stitches and complete each square relatively quickly, creating that all-important sense of achievement!
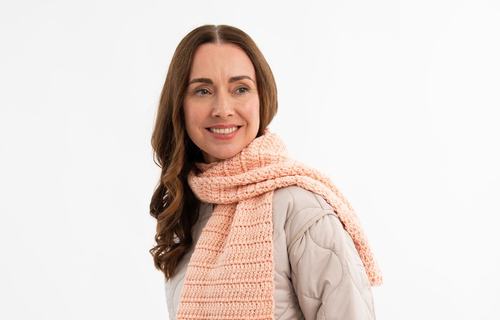
A person smiling at the camera wearing jeans, a beige puffer coat and a light pink crocheted scarf.

Crochet a scarf

There's a reason scarves are popular beginner patterns; they allow you to repeat the same stitch, get into a rhythm and generally improve the evenness of your crochet.

Plus, a scarf is something genuinely useful, fits everyone and makes a really thoughtful present. You could even create a matching one for your headband!

Ready to get started on a beginner's crochet project?

Find crochet kits from Wool Couture and explore the haberdashery section of the Oxfam Online Shop to help you get started on your first crochet project.

About the author

Claire Gelder is the founder of Wool Couture Company and the author of eight craft books, including Crafting the Wheel of the Year, Mabel Bunny & Co, and the Pocket Book of Crochet.

© Wool Couture Company Limited 2026. All rights reserved.

This pattern, its written instructions, photographs, illustrations and supporting materials are the intellectual property of Wool Couture Company Limited. They are licensed to Oxfam solely for use in connection with the Oxfam Crochet Your Own Headband project. The materials may not be copied, adapted, translated, reproduced, distributed, republished or used for any other commercial purpose without the prior written permission of Wool Couture Company Limited.